
TM 1-1500-204-23-11
(if required) and all necessary vacuum bag
(i)
Prepare the amount of resin required to
materials prior to mixing resin.
ill the disbond/repair volume. Prepare
the adhesive per paragraph 6-17.
NOTE
Refer to paragraph 6-17, Resin Preparation
(j)
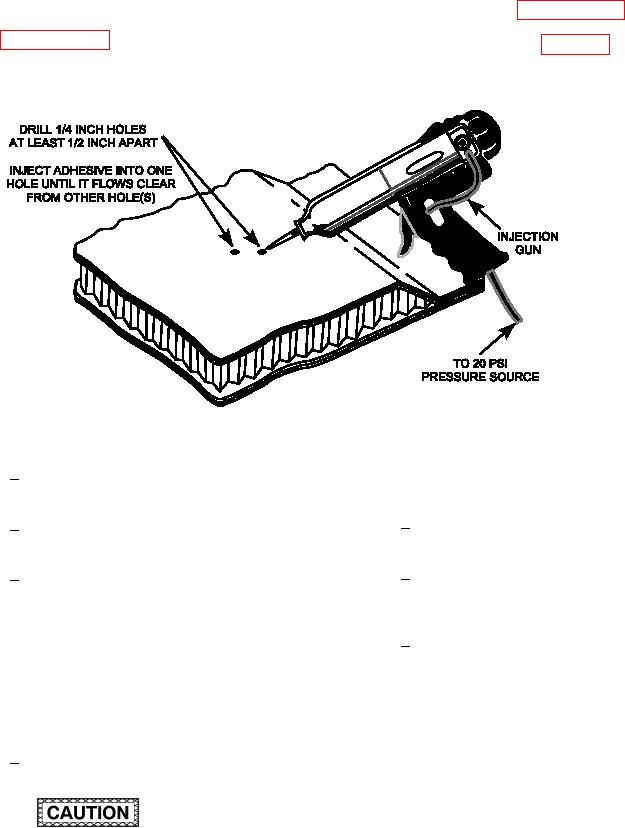
Inject Adhesive (see igure 7-41).
and Use, for the proper measuring and mixing
procedures.
Figure 7-41. Disbond Repair
1
Pour adhesive into injection car-
(k) Cure Adhesive.
tridge. Attach nozzle.
Tape over all injection holes with
1
2
Tape over intermediate injection
lash breaker tape.
holes with lash breaker tape.
Using a clamping device, release
2
Attach a regulated source of com-
3
ilm, and backing plates, apply
pressed air to sealant gun. Set air
pressure to the repair area.
regulator for 20 psi and inject adhe-
sive, using sealant gun and noz-
Invert the component so that adhe-
3
zle, into one hole and ill until adhe-
sive may ill the disbond area and
sive lows clear from another hole.
not low down into honeycomb
Remove tape from one hole at a
core. Inverting the component may
time. Inject adhesive into each hole
cause some adhesive to low out
until it lows freely from the other
of taped injection holes. A small
holes and is free of bubbles.
amount of outlow is acceptable. If
outlow becomes excessive, cover
Wipe off excess adhesive with
4
the area with release ilm and tape
clean, dry wiping cloth.
a metal plate beneath the area.
Allow adhesive to set at ambient
temperature for a minimum of 8
hours. As an alternative, the adhe-
sive/iller may be set using a heat
Failure to properly cure adhesive in accor-
source.
dance with the speciied cure cycle will result in
reduced repair strength may not be detectable
by visual or nondestructive inspection. This
may result in loss of structural integrity.