
0120
TM 1-1740-221-13&P&P
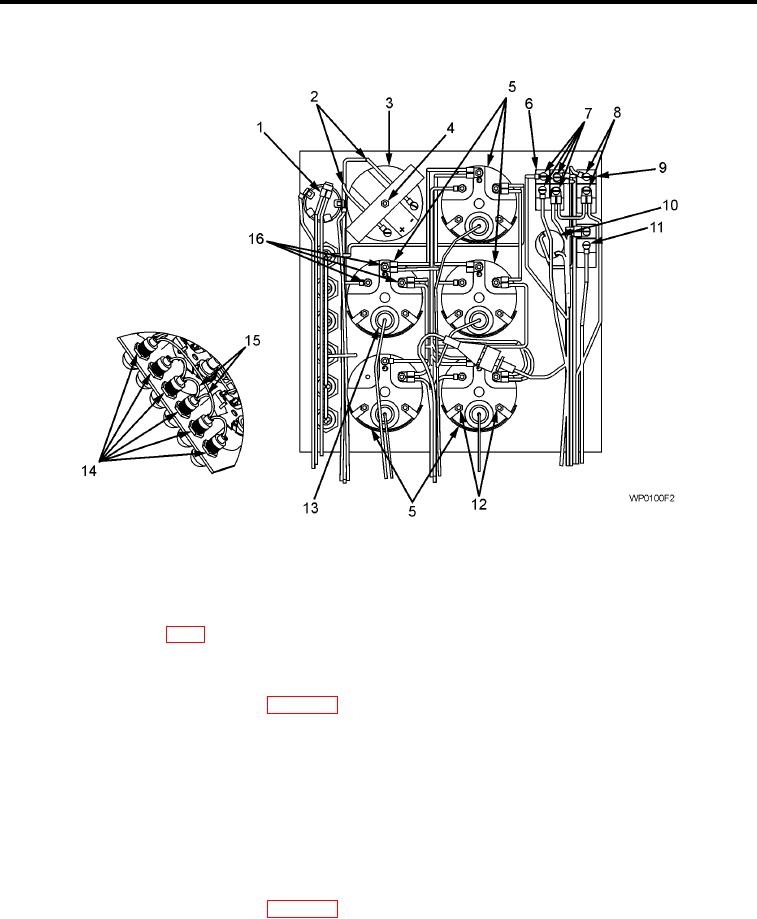
DASH PANEL - (CONTINUED)
Figure 2.
Dash Panel (Rear)
NOTE
Components and wiring should be tested for serviceability prior to replacement of components
or wiring, see (FO-1).
Components on the s Dash Panel are grouped together to ease maintenance.
1.
Disconnect battery negative cables (WP 0111).
2.
Locate defective indicating light lens (Figure 1, Item 1 through 6) and/or bulb.
3.
Remove lens (Figure 1, Item 1 through 6) by un-screwing lens. Bulb is positioned inside of lens cover.
4.
Remove bulb (Figure 1, Item 12) by pulling from lens (Figure 1, Item 11).
LIGHT (INDICATOR) HOLDER
NOTE
Tag all wiring during all removal processes to aid in reinstallation.
1.
Disconnect battery negative cables (WP 0111).
2.
Open dash panel.
3.
Locate faulty light holder (socket) (Figure 2, Item 14) and tighten.
4.
Remove wires from light holder by pulling from terminal and tag, to ease reinstallation.
5.
Remove lock nut and star washer on light holder (socket) (Figure 2, Item 14).
6.
Remove defective light holder.
01204