TM 1-1500-204-23-11
edge and circular template to assist in cut-
ting.
(5) To remove the ply, work the edge of a razor
blade or x-acto knife under the ply at the
cut line. Peel the ply toward the damage
cleanup hole edge. Once the ply has been
lifted slightly, use a sharpened putty knife
or spatula to completely remove the ply.
Use care not to damage the ply immediately
below the ply being removed.
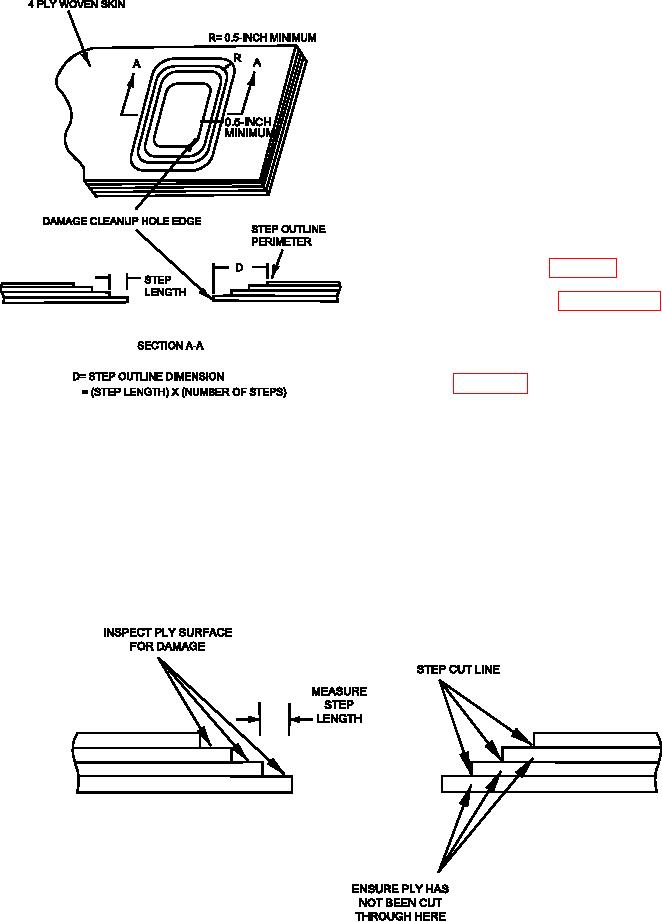
(6) Mark the next step outline perimeter by
measuring 0.5 inch in toward the damage
cleanup hole edge from the perimeter of the
previous step. All step perimeters should be
parallel. (See igure 6-24).
(7) Repeat step in paragraph 6-15g(2) and (4)
through (6) until all of the required plies have
been removed.
(8) Inspect the step joint for the following (see
(a) Measure the step length of each step
to ensure the required step length has
Figure 6-24. Step Joint Outline Layout
been achieved.
(3) If a rectangular repair is to be used, make
(b) Visually inspect the cut line at each step
a 1 inch diameter circle template to facilitate
to verify that the remaining ply at that
cutting the perimeter radii.
step has not been cut through.
(4) Starting at the step outline perimeter, care-
(c) Visually inspect the ply surface of each
fully cut through the irst ply of woven mate-
step to ensure that damage has not
rial using an x-acto knife or single edged
occurred as a result of previous ply
razor blade. Cut along the step outline
removal.
perimeter marked on the part. Use a straight
Figure 6-25. Step Joint Inspection Requirements

