
TM 1-1500-204-23-11
if the resin gels before adequate pressure is
bushings are seated lush with
applied and may result in loss of structural
moldline surfaces. See igure 7-65,
integrity. Select and prepare a heat blanket
View C.
(if required) and all necessary vacuum bag
2
Room Temperature Cure Cycle.
materials prior to mixing resin.
(i)
Prepare Adhesive. Prepare a small
a
Allow to dwell with nut, bolt
amount (25 grams) of adhesive per
and washer in place for 8
hours.
(j)
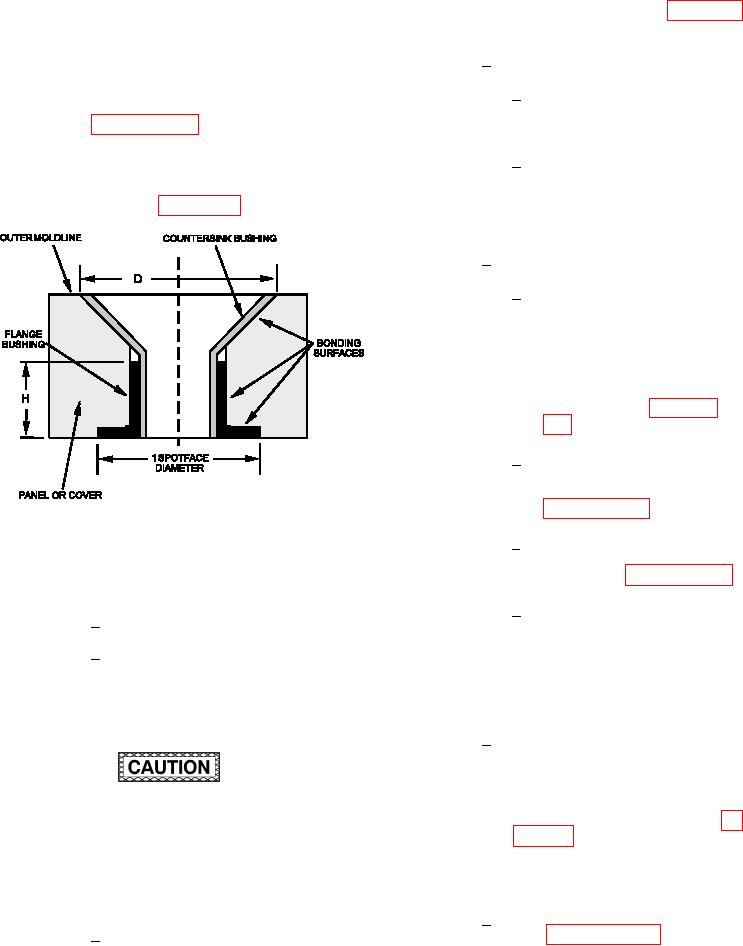
Apply adhesive to lange bushing and
Remove bolt, nut and washer.
b
countersink bushing bonding surfaces
Allow to dwell at room
and fastener hole bonding surfaces as
temperature for a minimum of
shown in fFigure 7-66.
5 days before proceeding to
step (m) below.
Elevated Temperature Cure Cycle.
3
Allow to dwell with nut, bolt
a
and washer in place for 8
hours. As an alternate, the
adhesive may be set using
a heat lamp. Use the cure
cycle from the system speciic
technical manual. Operate
heat lamps per paragraph
Remove bolt, nut and washer.
b
Layup the vacuum bag and
heat blanket as described in
Figure 7-66. Installation View of Captive Bushing
Cure the adhesive as speciied
c
Repair
in the system speciic technical
manual and paragraph 6-19.
(k) Install Bushings.
After cure, debag.
d
Install lange bushing into hole.
1
(m) If required, ream bushing to comply with
Press countersink bushing into
2
applicable system speciic technical
lange bushing. To aid in installa-
manual hole diameter.
tion, countersink bushing may be
frozen in a mixture of dry ice and
(n) Reinish.
solvent. A bearing press may also
be utilized to facilitate installation.
Sand squeezed out adhesive lush
1
with moldline surfaces with 180
grit abrasive paper. Inner moldline
end of lush bushing to be lush to
0.010 and sublush with surface of
Failure to properly cure adhesive in accor-
shoulder bushing as shown in ig-
dance with the speciied cure cycle will result in
ure 7-65, View D. Vacuum sanding
reduced repair strength may not be detectable
dust from repair area. Wipe with
by visual or nondestructive inspection. This
clean, dry wiping cloth to remove
may result in loss of structural integrity.
sanding residue.
(l)
Cure Adhesive.
Apply inish system in accordance
2
Clamp assembly together with
with paragraph 7-12b or the sys-
1
slave bolt, washer and nut. Ensure
tem speciic technical manual. Use