
0078
TM 1-1740-221-13&P&P
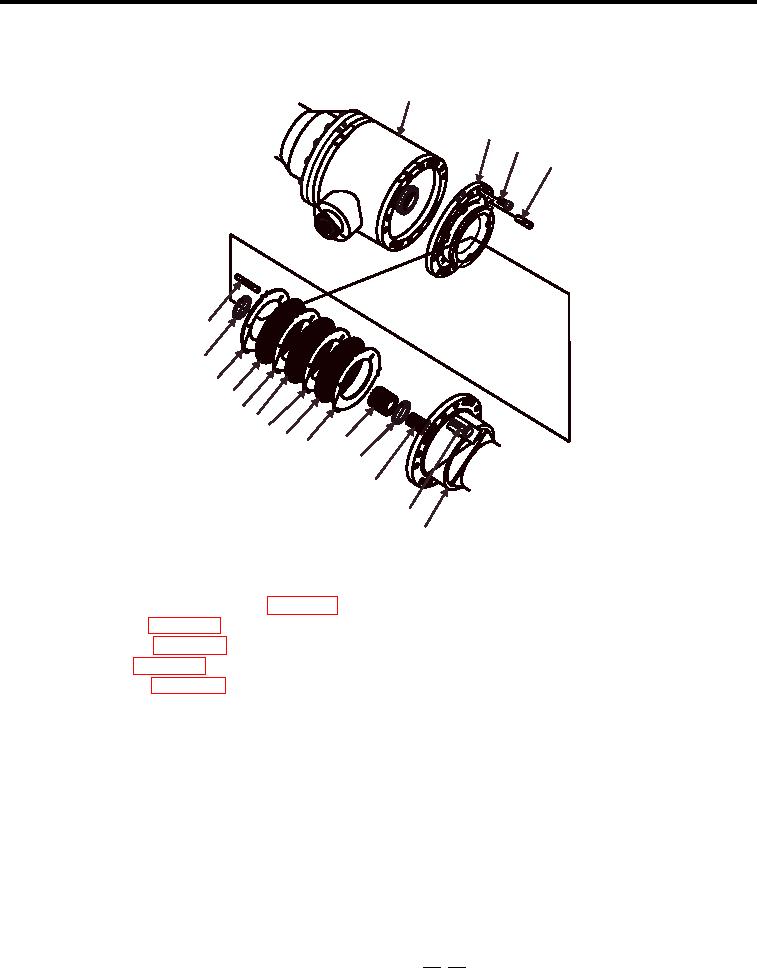
BRAKE FRICTION PLATES (FRONT AXLE) - (CONTINUED)
1
2
3
4
13
12
10
11
10
11
10
11
9
10
8
7
6
5
WP0069F1
Figure 1. Rear Axle Friction Plates (Removal and Installation)
1.
Disconnect battery negative cables (WP 0111).
2.
Jack vehicle rear (WP 0029).
3.
Remove rear tires (WP 0092).
4.
Drain rear axle (WP 0076).
5.
Remove rear axle (WP 0075).
6.
Place the rear axle on a suitable workbench supported by wood blocks at the center of axle. Use hoist
for support.
7.
Mark or stake axle housing (Figure 1, Item 5) and differential (Figure 1, Item 1) to help with the reinstallation
process.
WARNING
Severe burns may result if personnel fail to observe safety precautions when using heating
devices to remove mounting bolts.
NOTE
Heating differential housing (Figure 1, Item 1) at bolt thread location will aid in the removal of
mount bolts (Figure 1, Item 6). If a mount bolt does break during removal, extract the bolt after
irst removing the differential housing plate see Steps 1317.
8.
Remove 14 mount bolts (Figure 1, Item 6) (only one shown).
9.
Carefully separate the stub axle arm (Figure 1, Item 5) from the differential housing (Figure 1, Item 1) which
have two position pins (Figure 1, Item 4) (only one shown). If necessary, use a soft-faced mallet, tap the
casing and separate from differential using pry bar. Clean all housing mating surfaces.
00782