
TM 1-1500-204-23-11
(1) Positive Pressure Methods. There are
clamping force is too high. Spring clamps can be
many methods used to expose a component to
used in applications wherein resin squeeze-out during
positive pressure. For a repair, positive pressure is
cure would require C-clamps to be retightened peri-
primarily used for expanding foam adhesive, clamping
odically. A wooden tongue depressor or 1/8 inch thick
edge members, and holding repair details in place
silicone rubber pads may be used for pad material.
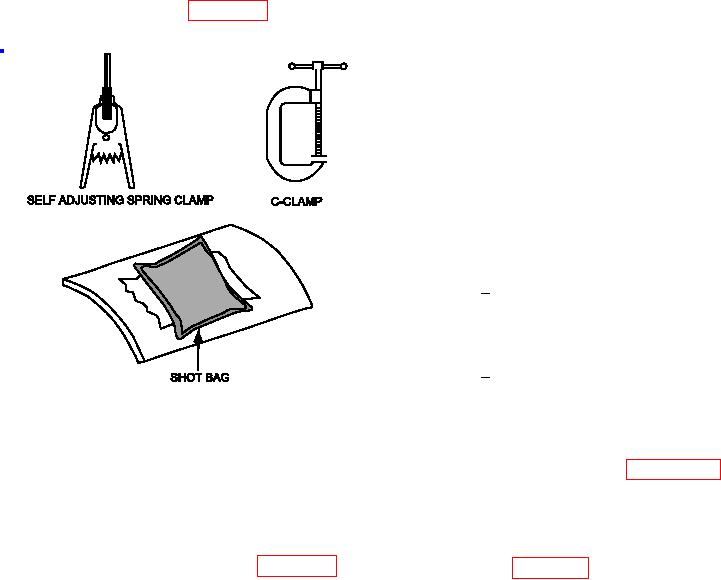
during the curing process. Figure 6-42 shows typical
Release ilm should be used between the part surface
tools for applying positive pressure in the ield.
and these pads. Use care as heat absorption by the
clamps can effect a heat loss to the system during
the elevated temperature curing of repairs. Positive
pressure methods using clamps and shot bags have
very limited use due to the low level of pressure
imposed. They are considered nonstructural pres-
sure methods. Clamps should only be used where a
structural edge is available for clamping.
NOTE
When using clamps, excess pressure may
squeeze out too much resin in the repair
area. Refer to the system speciic technical
manual or engineering for authorized method.
To distribute pressure evenly, clamps
1
should be placed approximately
every 1.5 to 2 inches on the parts
being bonded.
Determine the number of clamps
2
needed and the approximate place-
ment.
Clamping sequence (and
Figure 6-42. Methods for Applying Positive
adhesive and scrim cloth application)
Pressure
is important in controlling bondline
thickness and providing void free
(a) Shot Bag. A shot bag is a typical method
bondlines. (See paragraph 7-6 for a
used to contain expanding foam adhesives and for
discussion on controlling the amount
keeping repair details together. Shot bags can be
of paste adhesive applied to repair
applied to horizontal surfaces that are lat or contoured.
details using an adhesive comb and
The amount of pressure a shot bag can exert is limited,
for scrim cloth application). A typi-
however, a 25 pound shot bag that is 5 x 5 inches
cal clamping sequence is shown in
in size can only exert 1 psi. See igure 6-42. To
igure 6-43. The clamps are applied
prevent the bag from bonding to the repair, release
irst at the center of the parts being
ilm should be placed between the bag and the repair
bonded and then placed alterna-
details.
tively on each side. When applying
a C-clamp, tighten until it feels snug
(b) Clamps. Clamps, such as C-clamps and
and the body of the clamp does not
spring clamps, are tools used for pressing together the
rotate when pulled from side to side.
edges of components and/or repair details. C-clamps
Take care not to over tighten as dam-
are commonly used items but require careful use
age to the laminate will result. During
to prevent laminate damage due to over tightening.
the cure process, the clamps must
Clamps should always be used with pressure distri-
be retightened every 5 minutes until
bution pads as damage to the part may occur if the
resin gelation.