
0019 00
TM 1-1730-227-13&P
LUBRICATION CONTINUED
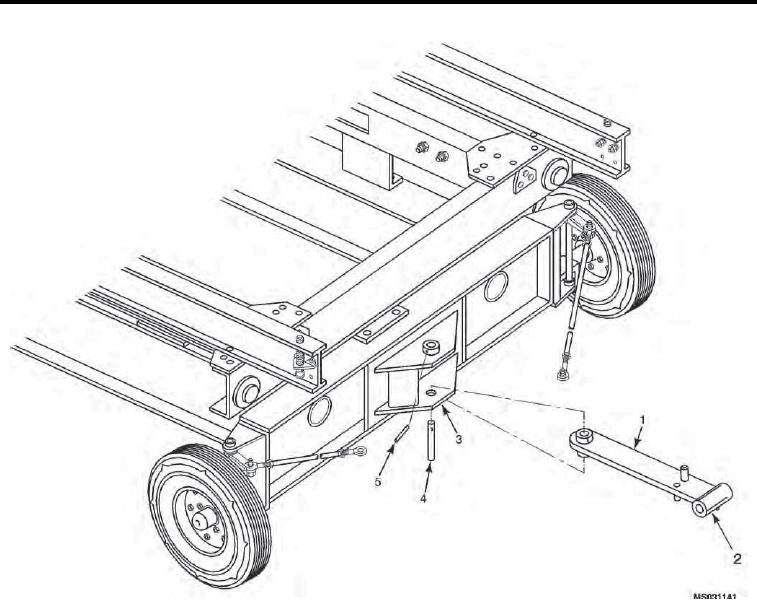
Figure 1.
Tongue Attaching Parts.
REPAIR OR REPLACEMENT
1.
Welding. Welding to repair cracks is to be done in accordance with FM 1-563.
2.
Use the appropriate hand file contained in the tool kit to remove burrs and sharp edges from tongue assembly.
3.
Tighten loose parts. Replace missing, damaged, bent or distorted parts.
REMOVAL
1.
Remove the groove pin (Figure 1, Item 5) from the tongue pivot pin (Figure 1, Item 4).
2.
Remove the tongue pivot pin (Figure 1, Item 4) securing the tongue assembly (Figure 1, Item 1) to the bracket
assembly (Figure 1, Item 3). Remove the tongue assembly (Figure 1, Item 1).
INSTALLATION
1.
Position the tongue assembly (Figure 1, Item 1) on the trailer and align the holes.
2.
Insert the tongue pivot pin (Figure 1, Item 4) through the bracket assembly (Figure 1, Item 3) on trailer into
the tongue assembly (Figure 1, Item 1).
0019 00-2