
TM 1-1500-204-23-11
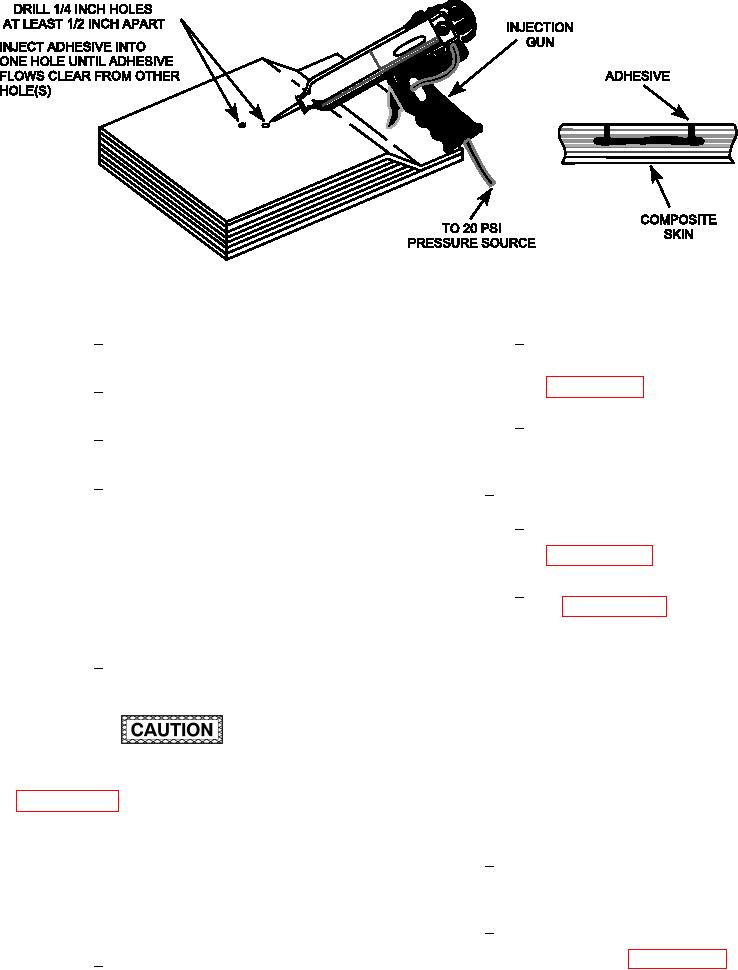
Figure 7-36. Delamination Repair Not Open to an Edge (Blister)
a
Pour adhesive into injection car-
Apply pressure for a minimum
1
tridge. Attach nozzle.
of 8 hours using weights or
shot bags as described in
Tape over intermediate injection
2
holes with lash breaker tape.
Allow to dwell at room
b
Maintain part at the speciied injec-
3
temperature for a minimum of
tion temperature.
5 days.
Attach a regulated source of com-
4
Elevated Temperature Cure Cycle.
2
pressed air to sealant gun. Set air
regulator for 20 psi and inject adhe-
Layup the vacuum bag and
a
sive, using sealant gun and noz-
heat blanket as described in
zle, into one hole and ill until adhe-
sive lows clear from another hole.
Remove tape from one hole at a
Cure the adhesive as speciied
b
time. Inject adhesive into each hole
in paragraph 6-19 and the
until it lows freely from the other
system speciic technical
holes and is free of bubbles.
manual.
Remove heat lamp.
Wipe off
5
(m) After cure, remove shot bags, or debag.
excess adhesive with clean, dry
wiping cloth.
(n) Reinspect the delaminated area using
NDI.
(o) If delaminations still exist after repair,
Too much pressure using a clamping device
refer to the system speciic technical
may result in resin starved areas.
See
manual to determine if damage is within
paragraph 6-19j, Pressurization.
negligible damage limits or partial thick-
ness damage limits.
Failure to properly cure adhesive in accor-
dance with the speciied cure cycle will result in
If delamination is not within par-
1
reduced repair strength may not be detectable
tial thickness damage limits, con-
by visual or nondestructive inspection. This
tact engineering for disposition.
may result in loss of structural integrity.
If delamination is within partial
2
(l)
Cure Adhesive.
thickness damage limits, repair in
Room Temperature Cure Cycle.
accordance with paragraph 7-3.
1

